WIO sensors
A sensor in TrainPanel represents a point or zone detection on the track. Currently, the only supported hardware is the WIO box: each sensor has an address made of a node (box number) and a pin (input number).
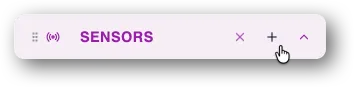
Create a sensor
In Edit mode, Sensors sidebar section, click +:
Instructions appear in the sensor properties panel:
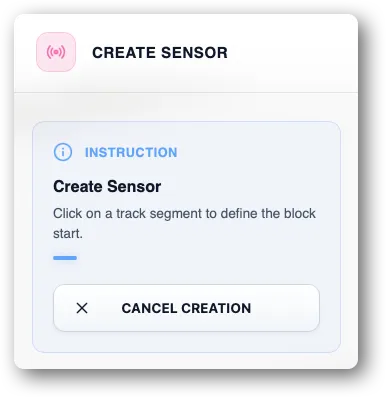
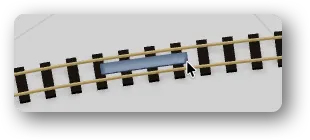
- Click once then twice on desired locations for the sensor ends. After the first click, the future sensor position is displayed.
- The sensor properties panel appears:
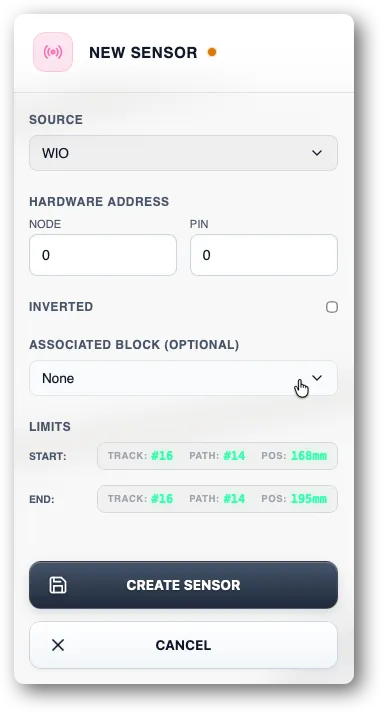
- For WIO sensors:
- WIO address: pick the node (box number) and the pin (input number).
- Attached block (optional): pick the block the sensor serves for locomotives detection.
- Inversion: tick if the sensor produces a logically inverted signal (active at rest, inactive when triggered).
- Click Create sensor to validate.
Understanding the start and end bounds
A real sensor is point-like — it triggers on passage. The two bounds (start and end) model:
- a detection zone (e.g. over 30 mm) for a current-draw sensor,
Inversion
Some modules send an active-at-rest signal. Tick Inversion: TrainPanel will automatically invert the state before publishing it to the supervisor.
Edit a sensor
Its card lets you:
- change the WIO address,
- change the zone (start and end bounds),
- change the attached block,
- toggle inversion.
Delete a sensor
Delete button. The block that used it loses its detection source; remember to reassign another sensor if needed.
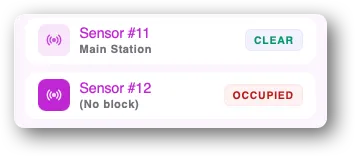
Verify a sensor works
In Manual + Real, run a train across it: its state is updated in real-time in the sidebar (an indicator changes color).
In Simulation, you can force-trigger it manually with no train running — see Testing a sensor in simulation (coming soon).