Place, move and rotate a rail
All rail manipulation happens in Edit mode.
Placing a rail
- Click on the library, then click on the canvas: handy when placing several copies of the same reference.
When placing, a ghost rail previews the orientation and footprint before commit. Press Tab to cycle the ghost’s attach port: each press, a different port of the rail becomes the snap point, effectively flipping the rail or — on a turnout — picking which end attaches to its neighbour.
Tip: Hold Alt (or Option on macOS) to temporarily disable port snapping.
Selecting
- Left-click on a rail: selects it and opens its properties panel.
Shift+ Hold + drag in empty space: opens a selection box to grab several rails at once.Ctrl/Cmd+ A: select all rails.Esc: clear the selection or cancel the placement in progress.
Moving
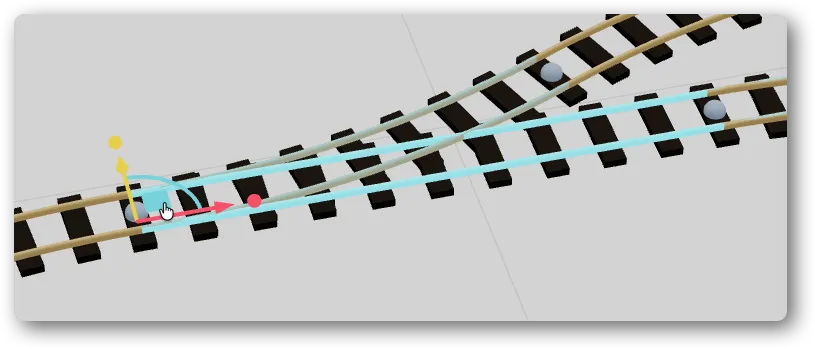
- Central square (blue): drag for free translation (on 2 axes).
- Arrows (red and yellow): drag to move along a single axis only.
- Port-to-port snapping happens automatically on approach: a visual cue indicates the candidate connection. Hold
Alt(orOptionon macOS) to temporarily disable snapping.
Rotating
- Rotation gizmo: drag the arc around the selected rail.
- Angular snap kicks in when approaching another port — this ensures the two rails align perfectly (tangency is guaranteed without having to do math).
Deleting
DeleteorBackspaceon a selection: removes every selected rail.- Before deletion, TrainPanel automatically disconnects the affected ports.
Undo / redo
Ctrl/Cmd+ Z: undo the last action.Ctrl/Cmd+Shift+ Z: redo.
Every placement, move, deletion or connection is recorded in the history with a readable label (visible in the Edit menu).