Flexible rails
Flexible rails have an arbitrary geometry: they don’t follow a length or radius set by the catalog. You draw them via a series of Bézier nodes with tangent handles.
When to use a flexible rail
- When your standard rails can’t close a loop without leaving a gap.
- To model a hand-laid track or a transition of radii.
- To fill the small offsets between two layout sections that don’t quite line up.
Placing a flexible rail
In the library, choose a flexible rail (using the “Flexible” filter if needed). Place it like any other rail.
Editing the geometry
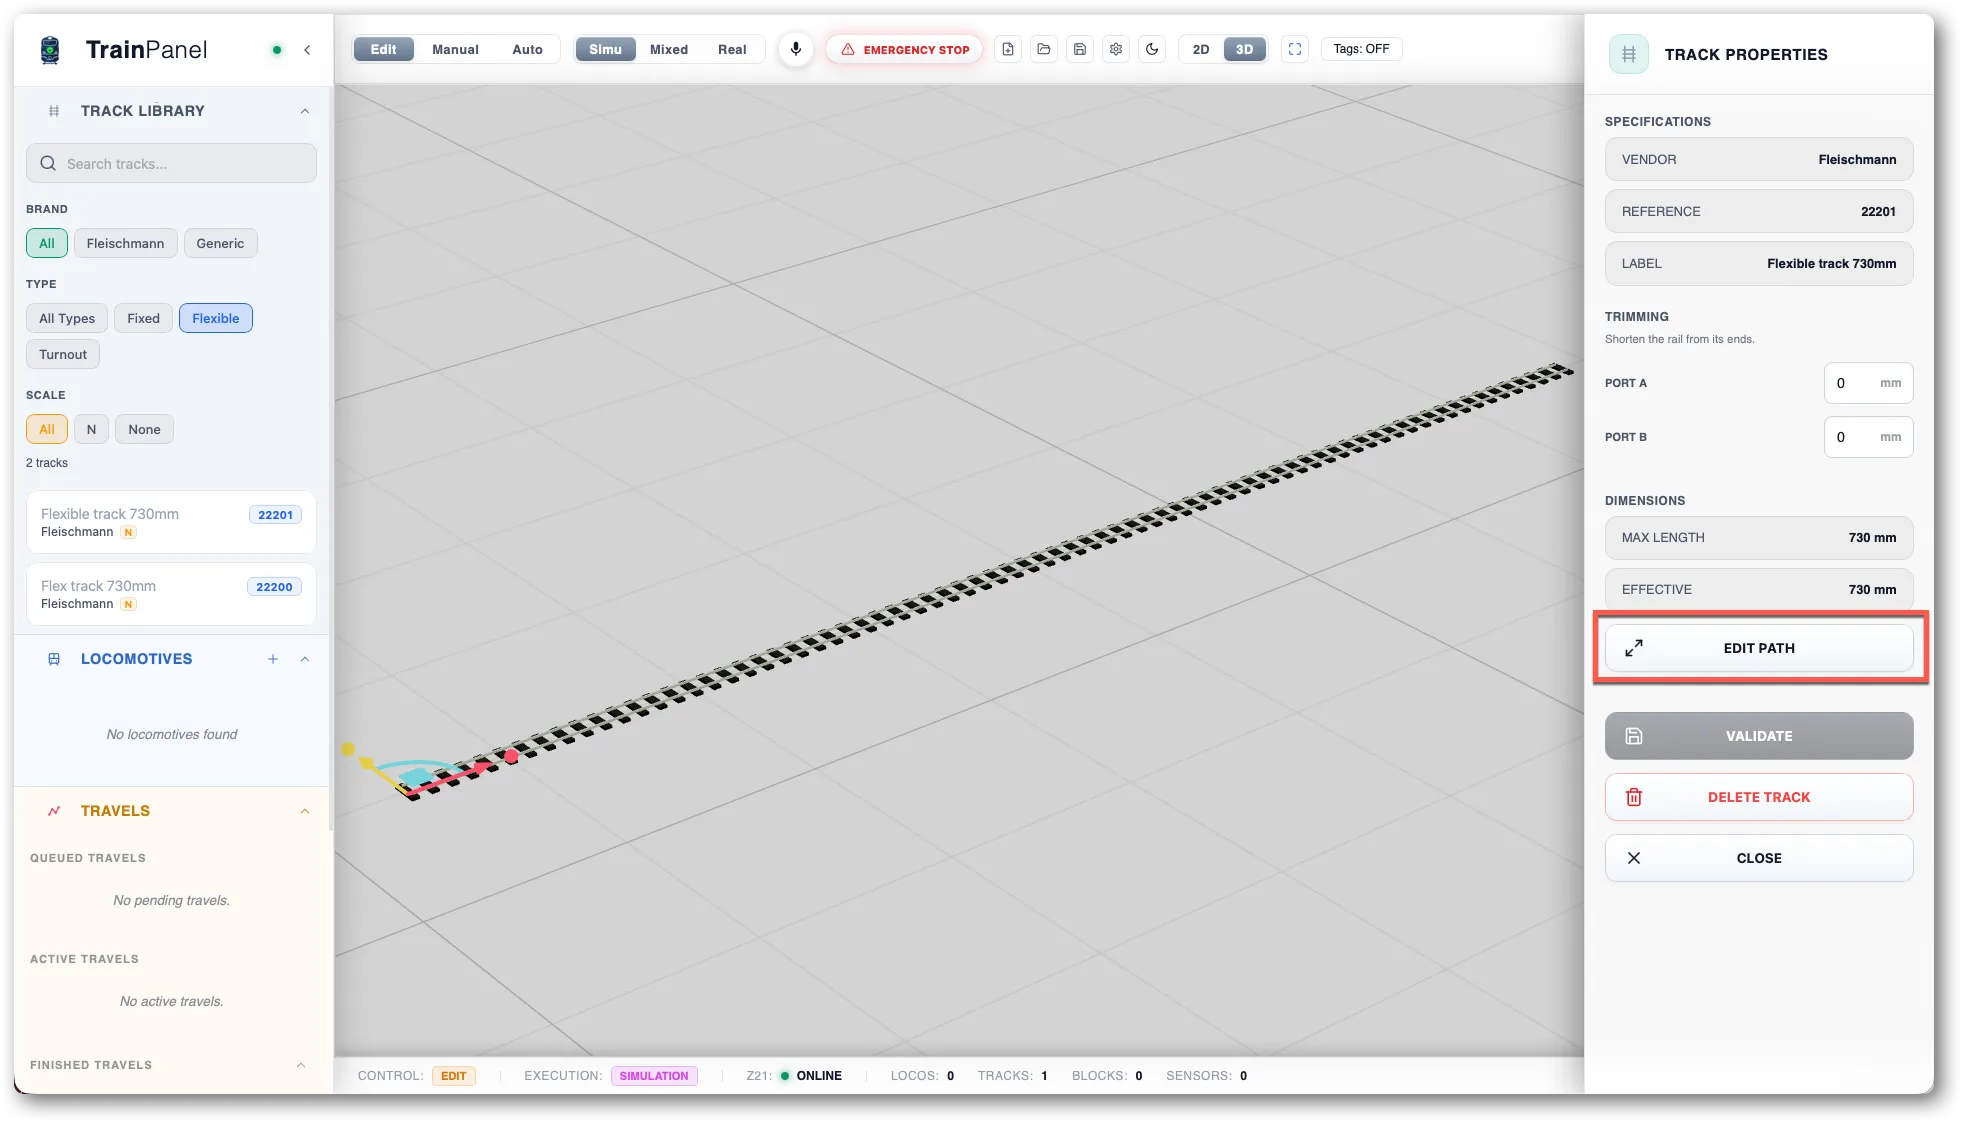
Select the flexible rail, then in the properties panel, click “Edit Path”.
The nodes then appear as handles:
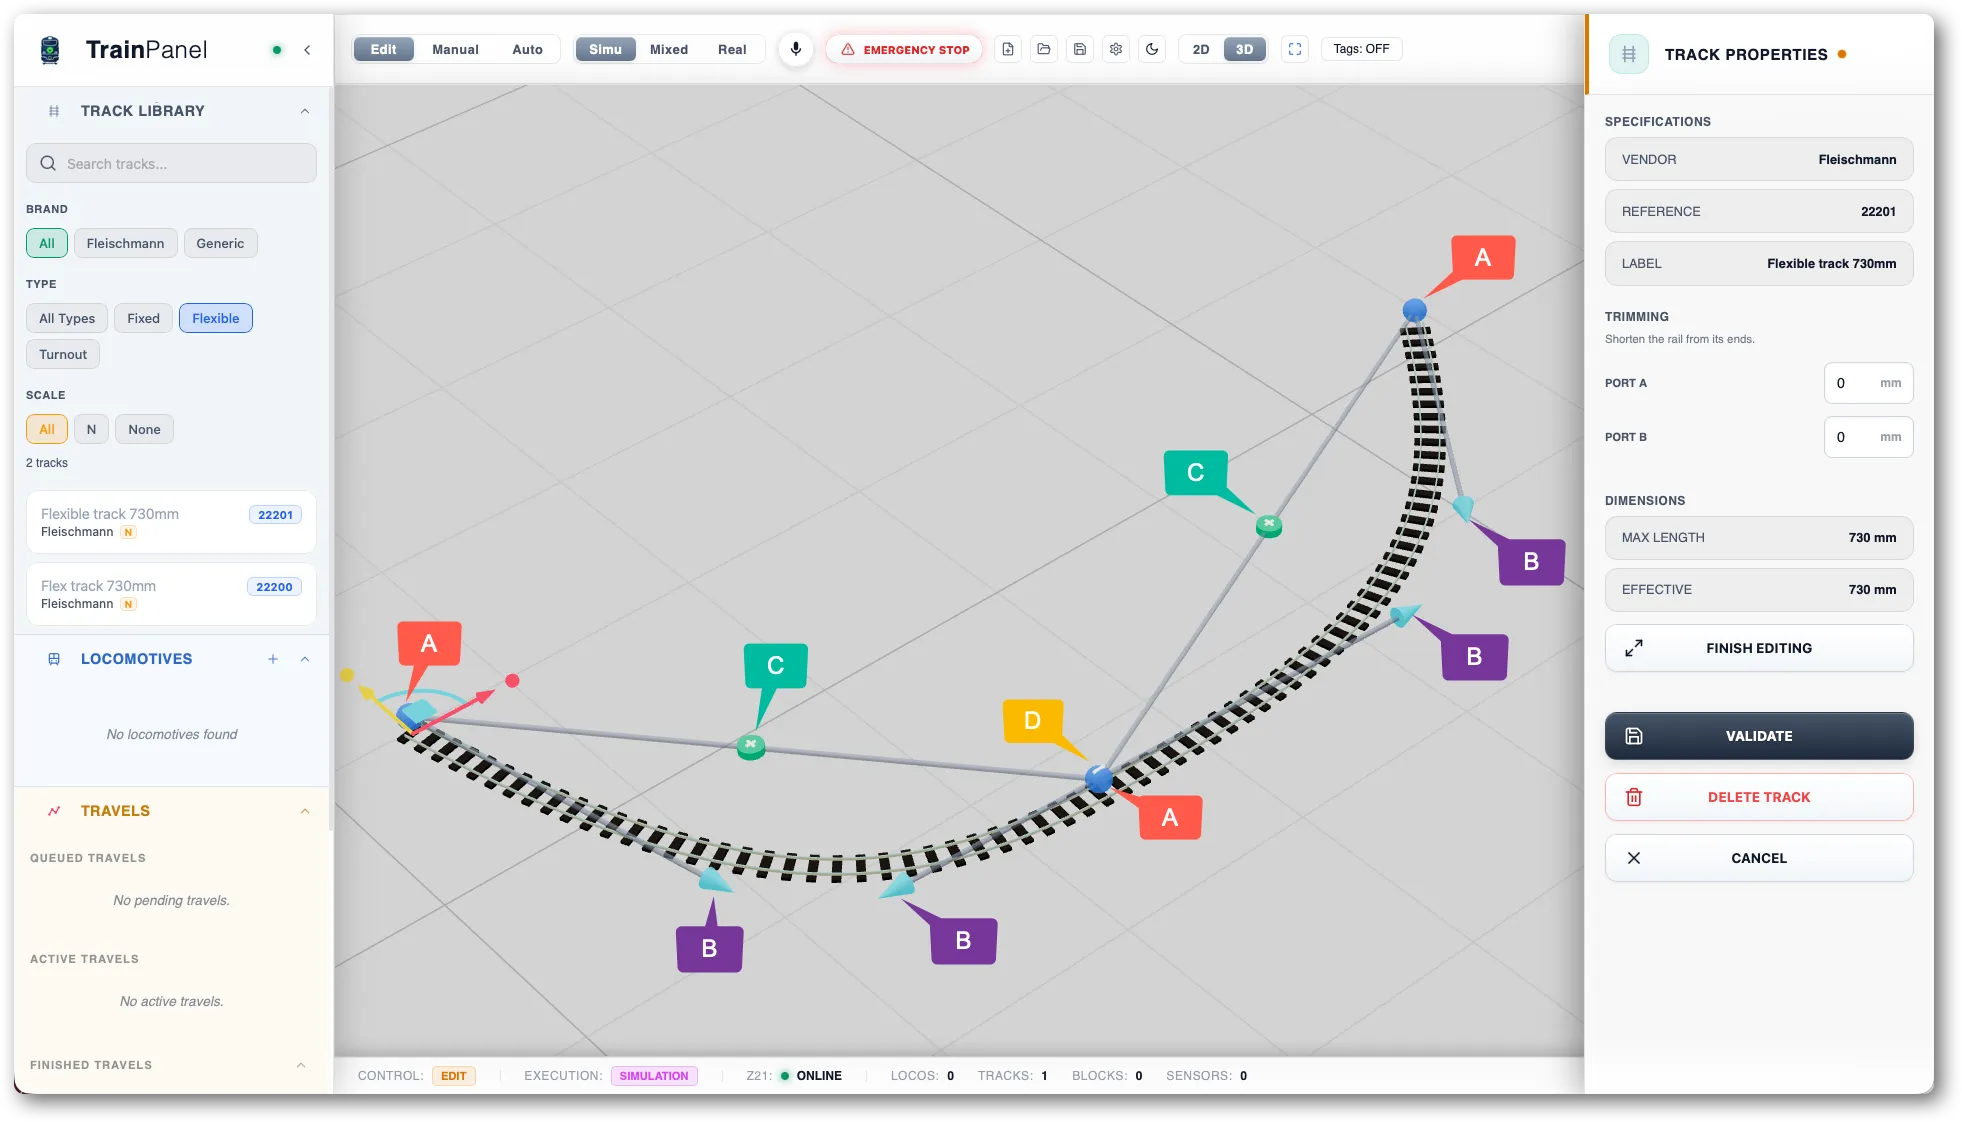
- A — Waypoints : These main nodes (placed at the ends and along the rail) define the track path. Drag them to adjust its trajectory.
- B — Tangent control : Directional handles (blue cones) allow you to adjust the orientation and force of the curvature at each node.
- C — Adding waypoints : Click the green
+button located on the construction lines to insert a new node. - D — Removing a waypoint : Click the delete icon (minus button
-) associated with an intermediate node to remove it.
Drag these various elements to adjust the shape as desired. The curve is recomputed in real time, along with the actual length shown in the properties panel.
Length
The length of the rail is monitored during modifications and cannot exceed the maximum length of the flexible rail. However, it can be shorter, as a flexible rail can be cut.
Finish Editing
To finish, click either Validate or Finish Editing.